BaseLinker system offers a possibility to send e-mail and SMS messages to customers directly from the panel. Messages can be sent manually for a single order from the order card, in bulk from the order list or using automatic actions. System allows you to create templates for such messages (including attachments). These messages can be sent from the default system mailbox @baselinker.com or from the seller’s mailbox.
When the system is properly configured, messages can be sent automatically when the selected event occurs, for example:
- When the FOD and payment confirmation has been received for a given Allegro order, the system sends a “Thank you for shopping” e-mail template to the customer containing a list of ordered products and a link to the order information page.
- After issuing the invoice and sending the package, the system sends an e-mail template “Your order has been sent” to the customer containing the attached invoice, a photo image of the packed parcel and a shipment tracking link.
Default mailbox
Your messages are by default sent from our server, from the mailbox @baselinker.com.
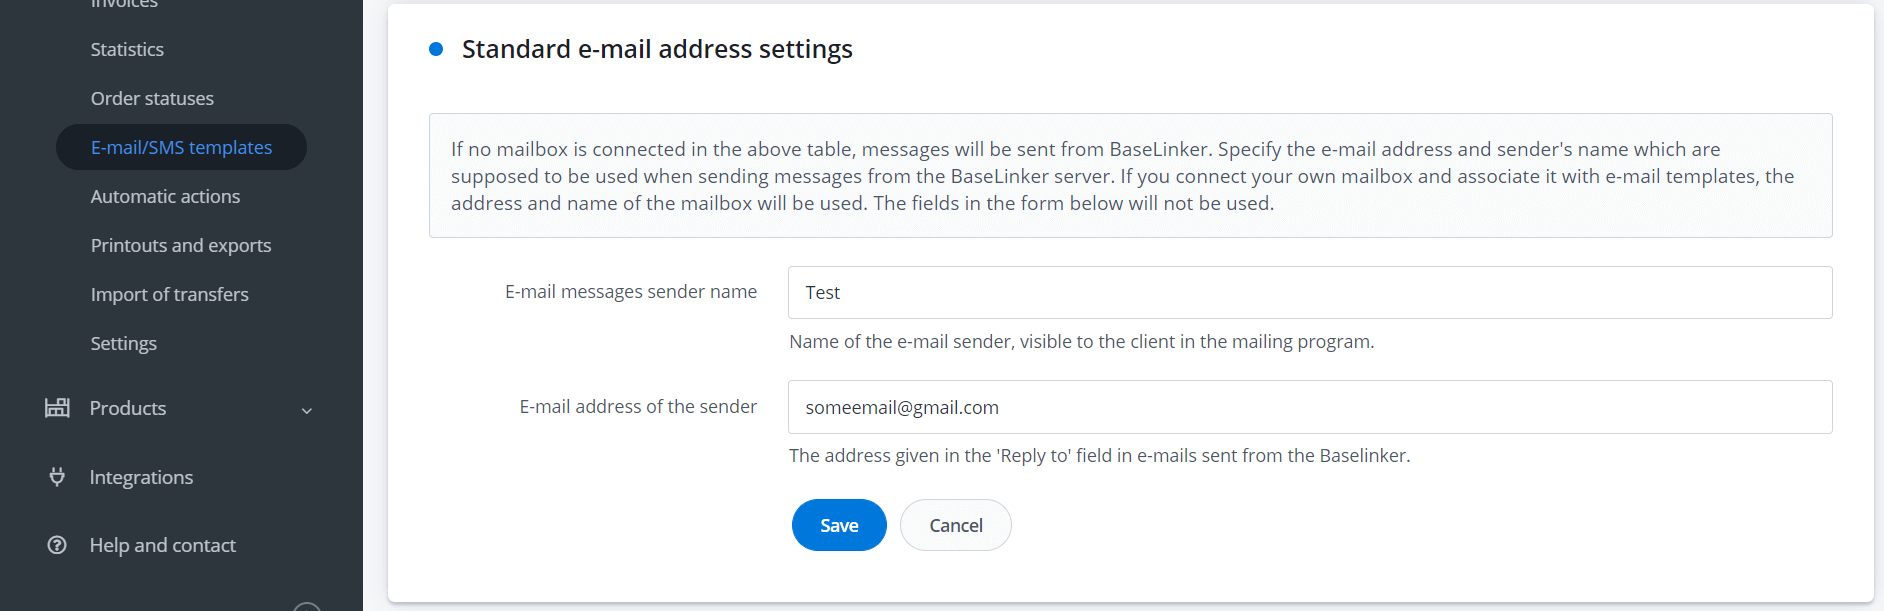
In the “reply to” field the buyer sees the address provided when setting up the BaseLinker account. You can change this in Orders → Email/SMS templates → Email accounts → Standard email address settings section, entering the email address and sender name shown to the recipient.
Personal mailbox
Adding your own mailbox not only reduces the risk of messages reaching the SPAM folder. If a customer decides to reply directly to a received message, you can also be sure that their reply will be sent to the mailbox of your choice.
In addition, most of the available mailboxes save messages in the “Sent” folder, so you gain additional sending confirmation, which can be useful in case of complaint proceedings or transactional disputes.
You can add your own e-mail accounts in Orders → E-mail/SMS templates → E-mail accounts. To connect your mailbox, after selecting the “+Add new account” button, select the “Add SMTP account” option from the drop-down menu.
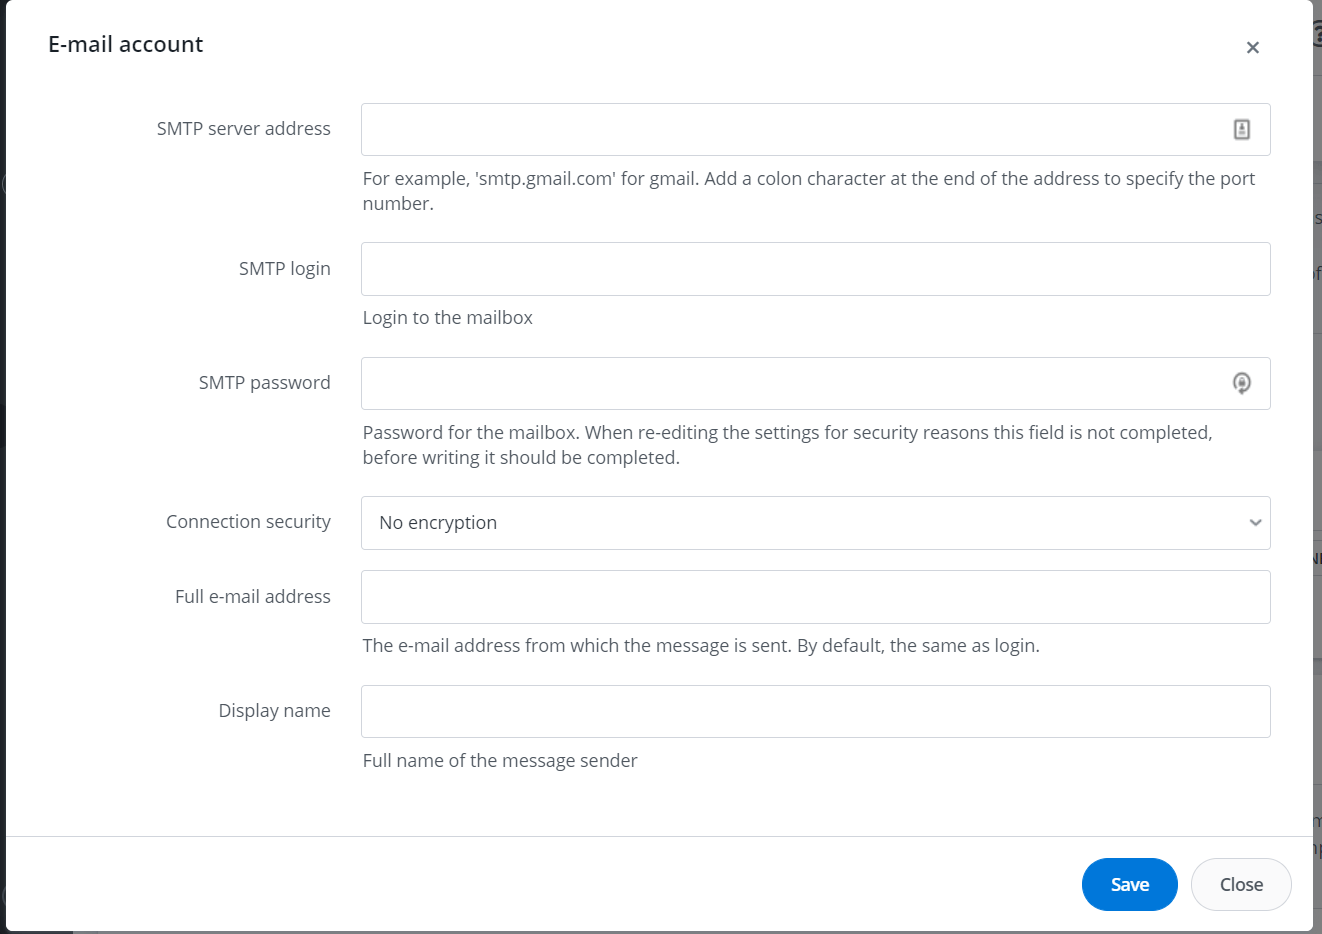
Next, complete the following information:
- SMTP server address – you will find this address most often in the mailbox support page. In some cases, you should also enter the port number in addition to the SMTP server address . Then you should first enter the SMTP server address, add a a colon, and then enter the port number.
- SMTP login – mailbox login. Most often it is a full e-mail address.
- SMTP password – mailbox password. The password must be entered manually. Make sure that the browser does not insert the previously remembered different password here.
- Connection security – you can choose an encrypted connection in accordance with TLS protocol. If the mail server you are using does not support TLS protocol, you should choose “No encryption”.
- Full e-mail address – e-mail address from which the message is sent (same as login by default).
- Name displayed – full name of the message sender displayed to the customer
After entering the abovementioned data, select the “Save” button.
To connect a Gmail account log in to your mailbox and then in the BaseLinker panel after selecting ‘+Add new account’ select ‘Add Gmail account’.
Connection test
After adding an e-mail account it is worth to check if the connection has been established properly by selecting the “Test connection” button. If the system cannot connect to the SMTP server of a given mailbox, edit the mailbox settings and save them again.
In case of a invalid connection, after several unsuccessful email sending attempts, BaseLinker will mark the mailbox connection as invalid and the message will be sent from the default mailbox @baselinker.com.
The customer’s reply will then be sent to the e-mail address set in Orders → E-mail/SMS templates → E-mail accounts → Standard e-mail address settings.
Creating e-mail templates
Email and SMS are ready-made message templates. You can use them both to send automatic messages and send them manually from the order card or order list. On the order list the templates will be visible under the envelope icon and on the order card – at the bottom of the page. You can also assign email templates to your own mailboxes.
You can add your own e-mail templates in the Orders → E-mail/SMS templates. There are no restrictions regarding the number of created templates 🙂

Each template is composed of the following elements:
-
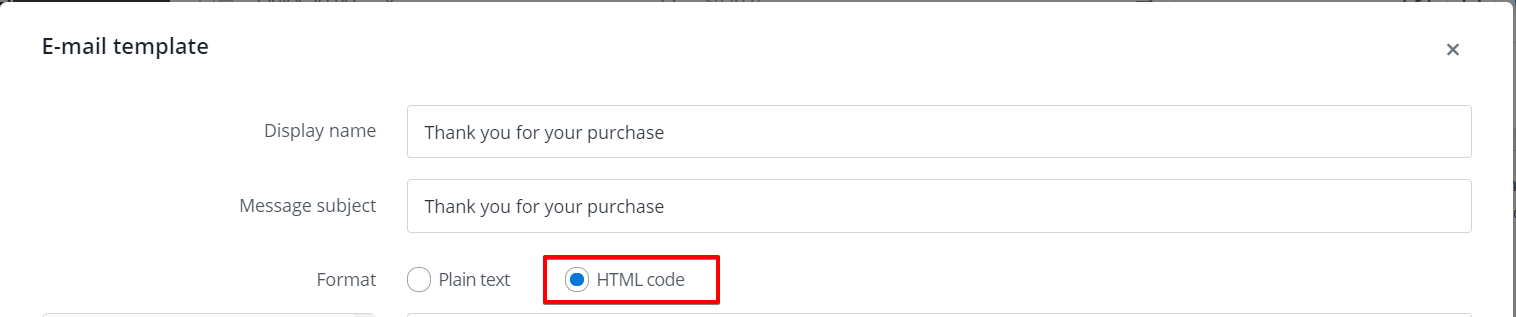
- Display name – name that will be displayed in the system and will identify a given template. This name will not be displayed to the customer.
- Message subject – you can use the special tags discussed in the BaseLinker Tags.
section.
- Format – you can create the message content as plain text or HTML code. If you use HTML tags when creating a template, remember to choose the HTML format – otherwise the tags will appear in the message.
-
- Message content – when creating content you can use special tags discussed in the BaseLinker Tags.
section.
- Email account – address from which the message will be sent.
- “Template hidden on the list” option – Check ‘yes’ if this e-mail template will only be used when defining automatic actions. It will not be visible in the list of e-mails elsewhere in the system (except for creating automatic actions).
- Attachments – discussed in section Message attachments
E-mail templates can use HTML tags to format text. A template can contain up to 25,000 characters, with CSS files linked from an external address.
BaseLinker tags
When creating e-mail templates, use our special tags, which are automatically converted into order-related information the moment the message is sent.
You can place BaseLinker tags in both the content and title of the message. You can add your email templates as plain text as well as HTML code (remember to choose the appropriate option in the ‘Format’ field – ‘Plain text’ or ‘HTML code’).
Sample e-mail to thank for the purchase:
Hello [name],
Thank you for ordering from our store.
The ordered products:
[items_list]

All the information related to your order, including the progress of your order, can be checked  on your personal order page:
[order_link]

Message generated automatically, please do not reply. Preferred contact through the form available on the order page.


Best regards
The current list of tags is visible in the Seller’s Panel, in Orders → Email/SMS Templates → Email/SMS Templatessection, in template edition mode. After hovering the cursor over the selected tag, the system will display the description. Just click on the tag to insert into the template.
The table below discusses the most frequently used tags.
| Tag | Additional information |
| [invoice_link] |
.
|
| [client login] |
|
| [shipment_track_link]
[shipment_track_link_en]
|
|
| [order_price] |
|
| [items_list]
[items_list2] |
|
| [order_link] |
|
Additional, user-created order page templates also have their own tags. They are visible in the first column of the table in section Orders → Settings → Information pages.

The e-mail content is displayed as programmed in the template. The message on the order page is displayed without HTML tags.
Message attachments
You can include up to three attachments to each email template. Each attachment can come in one of three available forms:
- Selected file from disk – you can add any file from disk and set a specific name, for example return card, complaint card, etc.
- Image of the package (Packaging Assistant) – The BaseLinker Packaging Assistant gives the user the opportunity to take a picture of the completed order.
- Invoice/document or selected printout
- Invoice/document – you can attach an invoice, correction, receipt or label to your e-mail message.
- Selected printout – any printout from the “Printouts and Exports” section (e.g. order card or self-made return form). It is also possible to add a shipping label.
Manual message sending
Sending messages from the order card
An e-mail or SMS can be sent manually from the order card. For this purpose, it is worth using one of the previously prepared templates.
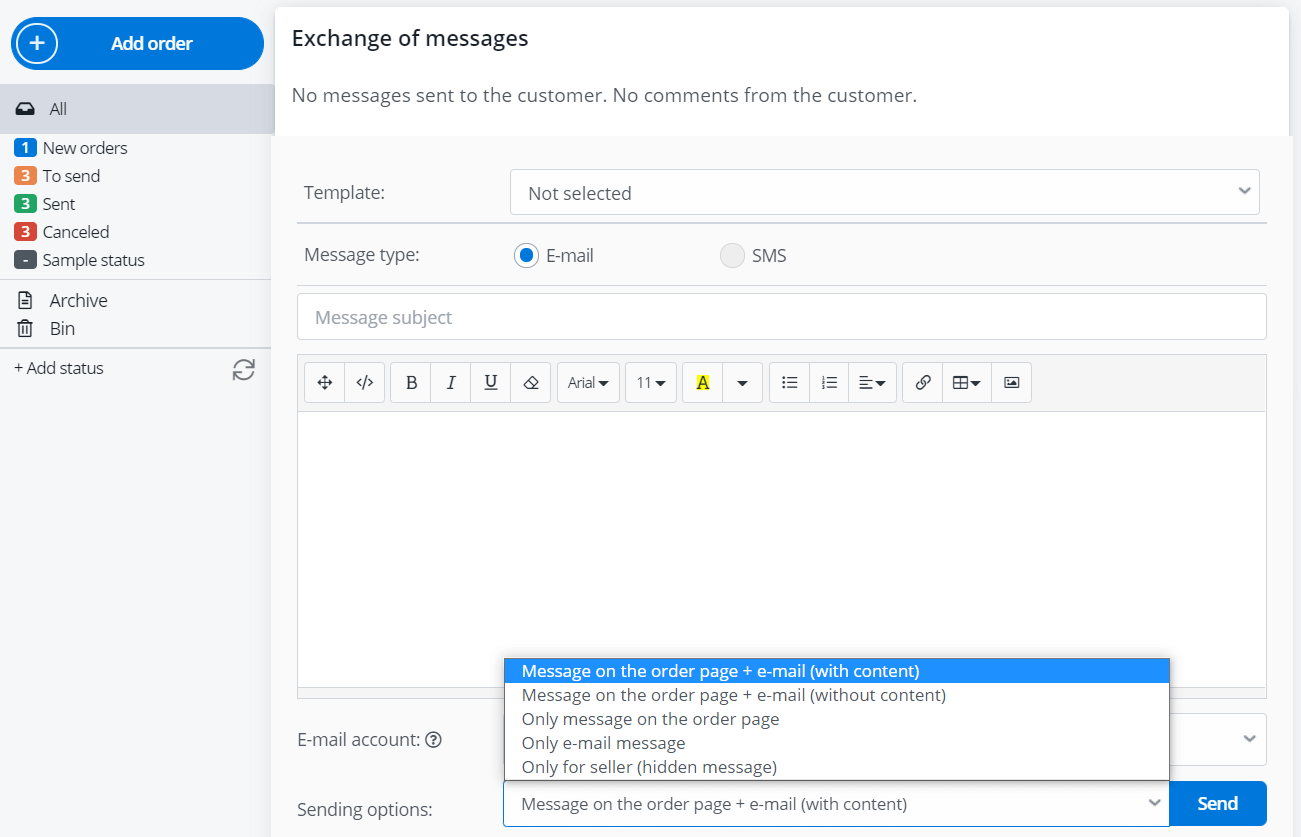
There are several types of messages sent in the system:
- Message on the order page + e-mail (with content).
- Message on the order page + e-mail (no content).
- Only the message on the order page.
- Email only – the message will not be displayed on the order page. On the order card the content of the message will be displayed regardless of the selected mailing option.
- Only for the seller (hidden message) – the message will not be sent to the customer. The content of the message will be displayed in orange on the order card as an internal message. This method is often used by users with multiple employees. The ” exchange of messages” table can serve as a window for exchanging information about the order between employees.
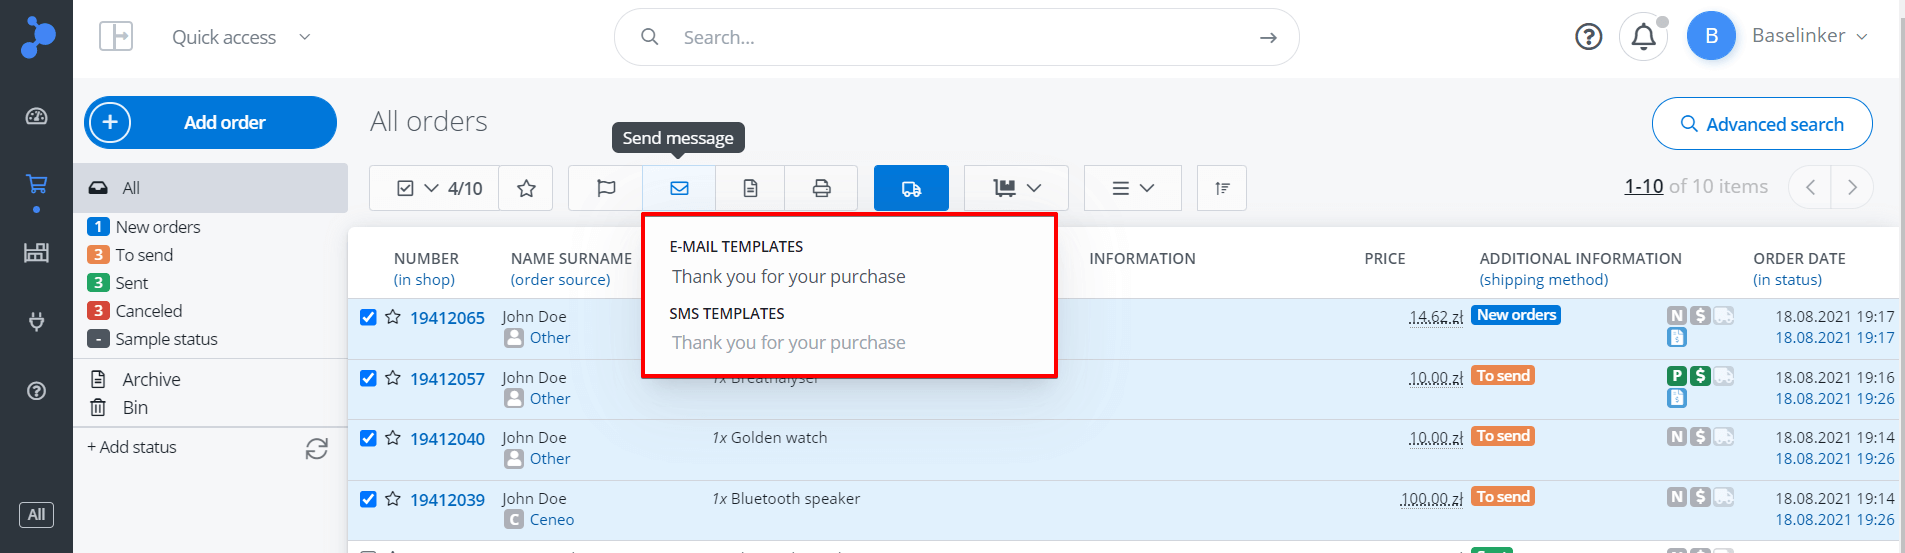
Sending messages from the order list
You can also send e-mail or SMS messages in bulk from the order list. After selecting the desired orders, select the “Send message” button.
Sending messages with automatic actions
BaseLinker can automatically send e-mails or SMS messages after a specific event has occurred. To do so, in Orders → Automatic actions → Add automatic action section assign the “Send e-mail” or “Send SMS” action to the selected event.
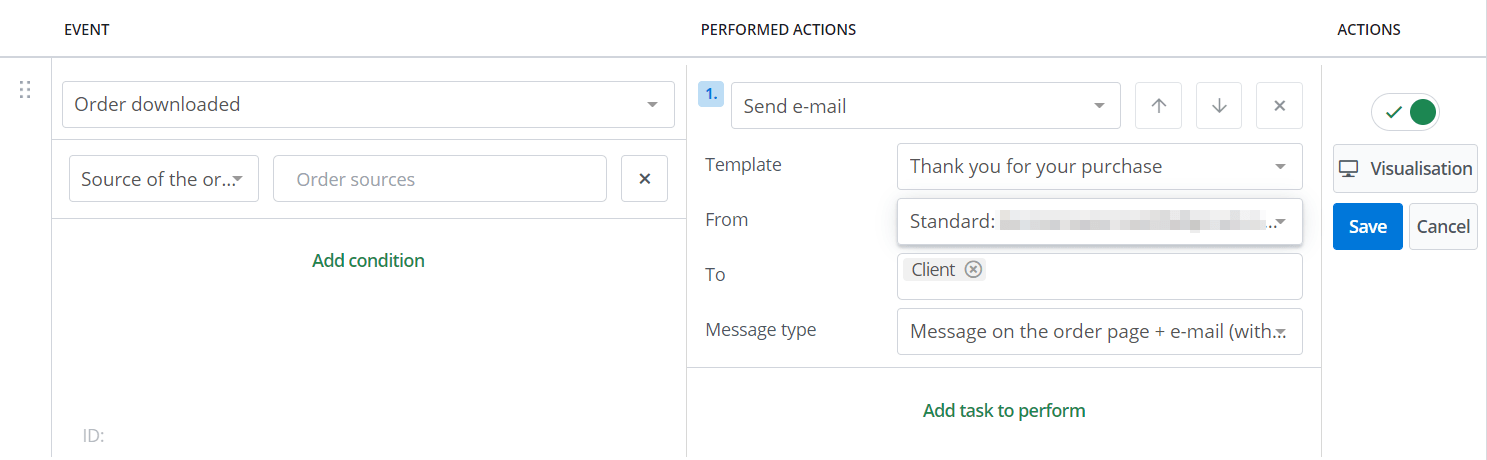
Here you have to choose:
- e-mail template,
- mailbox,
- message address (here you can choose both the customer’s e-mail address in the order and define any fixed e-mail address, for example to confirm that the message has been sent or to forward the information to the selected corporate department)
- message type, discussed in section above
Please remember a few rules when designing automatic actions:
- E-mail to the customer can be sent, among other things, when the status of a given order changes in BaseLinker. However, the change of statuses in the shop through an integration file or API will not trigger such an action. Therefore, it is not possible to create an automatic action based on the online store status change, unless the changes are made manually from the store’s panel.
- You should pay attention to the construction of automatic actions sending e-mails with attachment. For example, if the system has not yet issued an invoice for a given order, and the event triggering the automatic action sending e-mail to the customer has already occurred, it will be sent without an attached invoice. To avoid such a situation, it is worth to build the automatic action on the basis of the “Issued invoice”/”Issued pro forma invoice” event or add the condition “Invoice status: Issued”.
- For a message to be sent to a valid customer email address, the first automatic action should be carried out upon the “FOD Downloaded” event instead of the “Order Downloaded” event. Before downloading a FOD, the system will display the e-mail address default to the customer’s Allegro account.
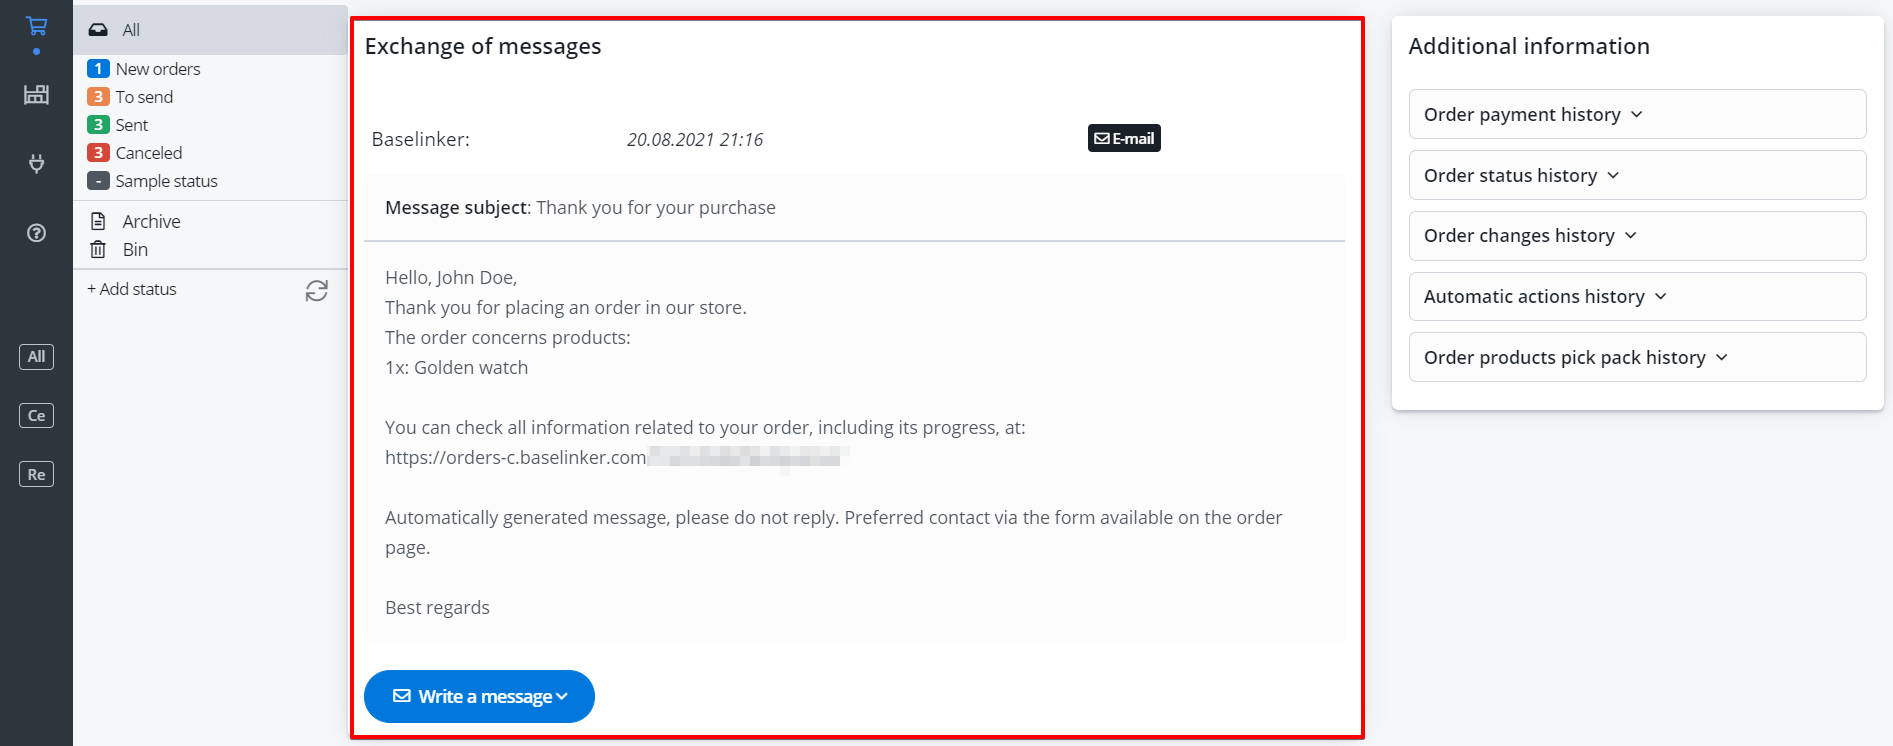
History of correspondence
All messages sent to the customer (both e-mail and text messages) will appear on the order card, at the bottom of the page. If a message appears on the order card, it means that it has been sent. The only exceptions here are the internal “Only for the seller (hidden message)”messages, additionally marked in orange.
The recipient’s e-mail address is displayed next to the message only if it is different from the current address set in the order. If the order card does not display the address to which the message was sent, it means that it has been sent to the address that is currently shown in your order.
On the Order Card you can also check the e-mail address the message was sent from and whether it was sent successfully. To do this, hover the cursor and click on the date and time of sending the message.
Automatic action history
On the order card, in the “Additional information” section the history of automatic actions is available. Here you can see the name of the displayed e-mail template that was sent to the customer. It is worth noting that the name of the e-mail template is not the same as the e-mail subject.
Customer response follow-up
The seller may choose one of two ways of communication with the customer:
- Outside BaseLinker – the customer can write directly to the mailbox of the sender of the message. The seller can choose Thunderbird as an alternative to MS Outlook to handle such emails. It is a leading multi-platform client of open source mail and calendar, free for corporate and personal use. In such a case, to help in finding the order related to a given customer’s e-mail, it is worthwhile to install a plug-in available in BaseLinker system Thunderbird.
- In BaseLinker – via the form available on the order page. In this case, it is worthwhile to include the message “Message generated automatically, please do not reply. Preferred contact via the form available on the order page.”
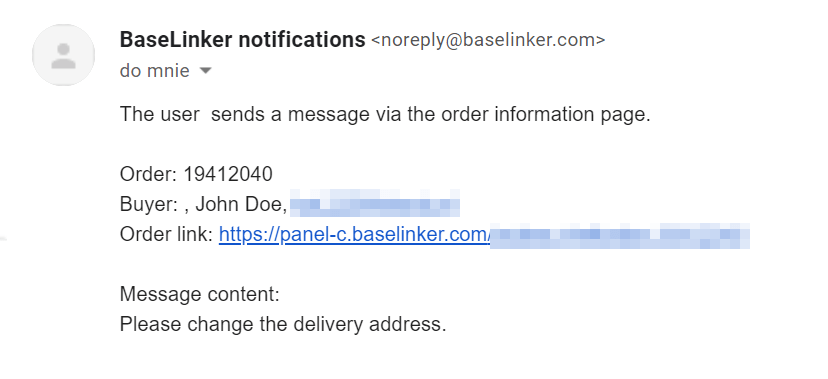
If the second option is selected, the customer’s response will appear in the correspondence history on the order card. In addition, information about the customer leaving a message on the order page is sent to a separate e-mail address, indicated in section Orders → Settings → Settings → Other → E-mail address receiving notifications.

After changing the e-mail address stored here, you should also keep an eye on the previous address for a certain period of time. It is not possible to update the e-mail address for already existing information pages that have been sent to customers.
The information sent to the abovementioned e-mail address includes the customer’s login, order number, information about the buyer, a link to the order in BaseLinker and the message from the customer.
To reply to a customer’s message, you must log in to the BaseLinker panel using the link to your order included in the notification.